Sunday 30 March 2014

Necrons vs Space Wolves 1750

Here's a few photos from a couple weeks back, before going on holiday my Necrons took on Space Wolves at 1750. 

Got off to a solid start by taking apart his two Rhinos, pinning one of the squads inside, and getting a lucky scatter from the Doomsday Ark that forced a morale check on the Thunderwolf Cavalry who fled off the board. That gave me plenty of time to rapid fire his squads now on foot, and when the Land Raider came into range it received the Haywire and Gauss treatment putting the Warlord and his squad of Blood Claws on foot as well. A lucky failed charge by the Warlord and his squad saved my Warrior blob from being assaulted to death, allowing them to deal with the depleted squad of Space Wolves who had made it into combat while the rest of my army gunned down the Warlord and Blood Claws.

That just left the squads holed up behind the defence line and a Razorback. There was little they could do to me, with AV13 all round and my Overlord tanking with his 2+ save, so it was just a matter of making it too dangerous for him to try any desperate objective contesting. My Night Scythe also returned to the board about that time, and the two Harbringers of Despair that it dropped off helped make short work of the units behind the defence line.

For once my Warlord Trait came in useful, giving Move Through Cover to all my units within 12". That let me move with ease through the dense forest terrain without fear of getting pulled out of formation or having any of my vehicles stuck immobilised. The three key points of the game really came down to my opponents dice though. First when one of his squads were pinned after the destruction of their Rhino. Second the Thunderwolf Cavalry fleeing off the board turn one. And finally the failed charge by the Warlord and Blood Claws.

The Necrons advance
Space Wolf Land Raider moves up the flank
The Rhinos and Thunderwolf Cavalry didn't last long

Necrons move through the terrain with ease
The Night Scythe deposits its deadly cargo
Gauss and Haywire make short work of the Land Raider

Survivors amidst the wreckage of the Land Raider
The Space Wolves assault the Warrior horde
The Space Wolf Warlord looks isolated in the ruins of his Land Raider
Last man standing after his transport and squad are wiped out


Necrons have cleared up most of  the board now
Necrons advance to finish off the Space Wolves
Last stand of the Imperial defenders

Saturday 8 March 2014

Continue the Carnage

We managed another Carnage game on Wednesday, this time featuring the Tyranids, Necrons, Orks and an army of Grey Knights supported by an Imperial Knight.

The Orks started things off in style, racing their Battlewagon straight at the Imperial Knight planning to crush it with their Death Rolla. The Death Rolla tears huge chunks from the Knight, leaving it on a single remaining hull point, but the Knight destroys the Battlewagon and kills several of the Lootas inside, who promptly flee.

While the Orks and Grey Knights start by tearing each other apart the Tyranids swarm towards the objective, while the Necrons play things carefully by keeping their armoured vehicles back where things are a bit safer.

The Orks, deciding they've caused enough damage to the Imperium for now, turn their attentions towards the objective with a hasty make-shift alliance with the Grey Knights allowing the two bruised but unbroken forces to start threatening the Tyranids and Necrons, who respond by passing each other by to counter the newly formed team.

The Orks manage to shoot down the Necron Night Scythe with a great round of shooting from the two remaining Lootas. When the Overlord, now out for revenge at the destruction of his transport, enters the board the Ork Bikers rush him and his squad of Warriors. However the Ork charge is generally underwhelming and the Necrons turn the combat into a war of attrition that lasts for the rest of the game.

Shooting from the Tyranids and Necrons severely cuts into the size of the mob of Ork Boyz, but still leaves them enough to charge the Tyranids holding the objective and chase them off. Meanwhile the Grey Knights have been methodically advancing as the Techmarine slowly repairs the Imperial Knight. The Tyranids realise that leaving the Knight to survive any longer will make it too tough to kill commit their forces to destroying it, with multiple shootings attacks bringing it back down to a single hull point before charging it with the Carnifex.

The Tyranid monster slams into the broken hull of the Knight and finally destroys it. In a last act of defiance the Knight stumbles toward the objective, crushing the Carnifex under its weight, before its reactor explodes killing two of the Tyranid Gargoyles unfortunate enough to be too close.

Undaunted the Techmarine and his bodyguard assault the Warboss and his remaining Boyz, supported by the Grey Knight Dreadnought. They clear the Orks from the objective but are themselves destroyed when the Tyranid Harpy returns allowing Termagaunts and Gargoyles to retake the objective for the Tyranids.

It was only then, after sitting out most of the game, that the Necrons arrived on the scene, showing up in strength to cut down the Tyranids on the objective and end the game with solid control of the centre of the board.

The roll for the objective only gained the Necrons 5 victory points, and without any secondary objectives it was a close thing but they still managed to take the win.


No one is surprised that the Orks fill their deployment zone

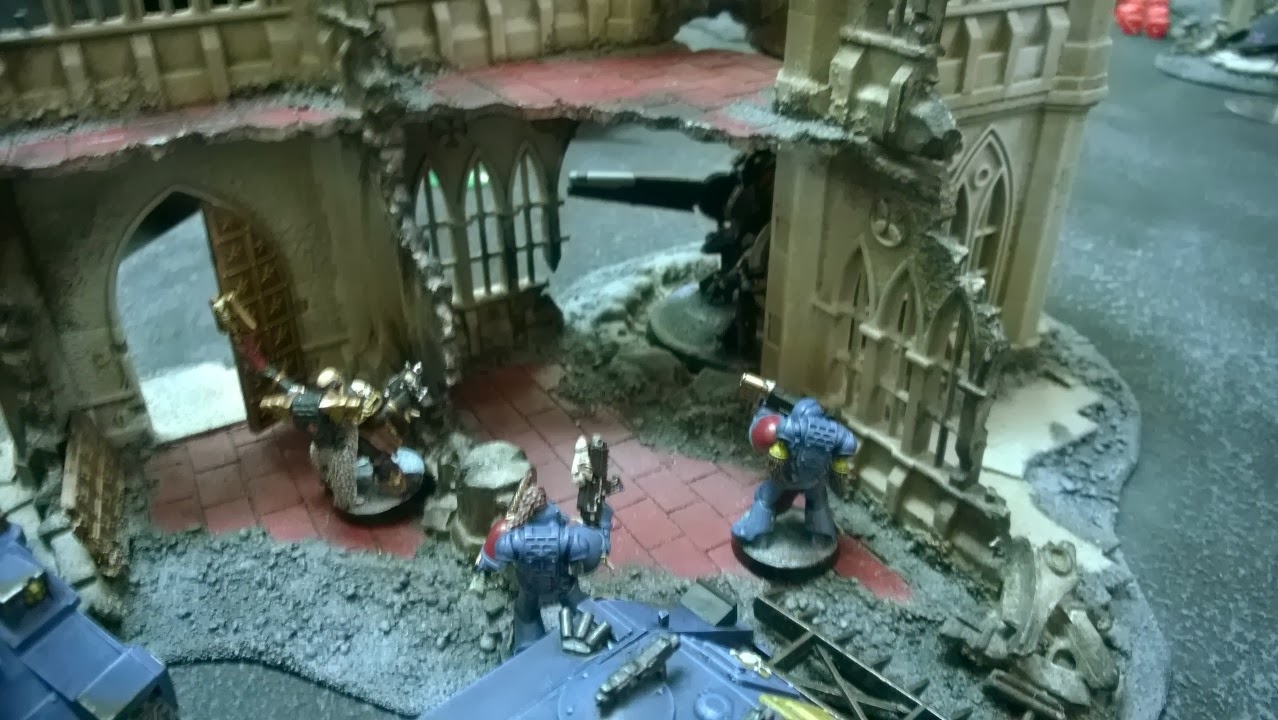
Grey Knights and a Grey Knight Knight

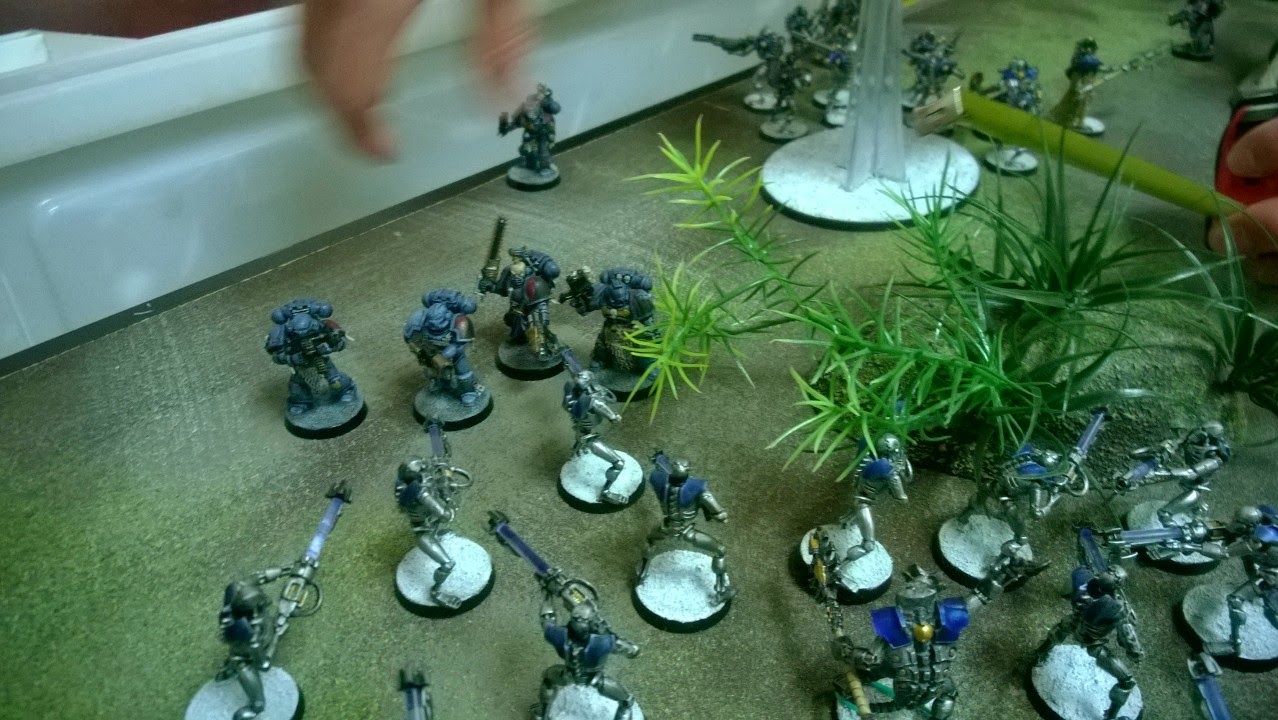
Bugs all over their zone too

Necrons play it safe, and stay in the vehicles

Orks immediately go for the biggest target on the board

Ramming speed for the Orks!

Tyranids swarm towards the objective

More Tyranids form a second wave

Battle damaged but alive, the Knight turns towards the Tyranids

Orks remember the objective and turn that way

Even Necron computing struggles to calculate the number of Tyranids

The swarm keeps rolling up towards the objective

Ork Bikers charge the Overlord's squad, but fail to break them

Orks and Grey Knights seem to have put their differences aside

Necrons and Tyranids decide to deal with the combined Orks/Knight threat

Tyranids push past the objective, and threaten to destroy the Imperial Knight

The Carnifex swoops in to attack the Knight

The resulting explosion kills the Carnifex, but his work is done

Necrons, safe in their vehicles, wait for their foes to finish each other off

The Ork Bikers still struggle to work through the Necrons

The Warboss and his last few Boyz chase the Tyranids off the objective

Combat continues to go nowhere fast

Now the Grey Knights want to take the objective from the Orks

Knights kill the Orks and consolidate onto the objective

The Tyranids swoop back round to respond

Monday 3 March 2014

Guild Ball Kickstarter

Shark, team captain of the
Fisherman's Guild
I've recently backed my first Kickstarter, deciding to put my money behind the new sports wargame Guild Ball. It's well worth checking out, the concepts and artwork are fantastic and the models they've been producing so far look amazing.

I've gone in at the £50 for two teams level which will give me enough to run a game with to demonstrate to others who are interested and I'm currently leaning towards using the Fisherman and the stretch goal Brewers teams. Having seen the quality of the resin models they've posted photos of so far I'm very tempted to up my backing to upgrade from metal to resin, it's another £35 to get both teams in resin but it does look like it will be worth it.

They've now released a Quick Play Rules pack to demo the game, so I'm looking into arranging a few sessions of this. It looks like a few other people are getting behind this game locally, so with any luck I'll not be short of a game when it's released and I may just be able to get a few more people interested with a few sessions.

Guild Ball have both a website and a Kickstarter. They're also active on Facebook, Twitter, YouTube and TwitchTV.


Sunday 2 March 2014

It Was Carnage

We recently played a game of Carnage, the 40k four-player rules. Players were Dark Eldar, Tau, Space Wolves and my Necrons and as well as the core rules we added some additional secret secondary objectives in the form of modifying the table in the Pact of Blood mission from the main rulebook (pg 365).

Dark Eldar dominated the board from early on, claiming first blood by killing off a squad of Tau battlesuits then killing enough drones to force a leadership test on one of the Riptides which fled off the board. I made the mistake of using Counter-Tactics to remove Night Vision from the remaining Riptide, fearing its large blasts would cause havoc amongst my hordes of Warriors, but this meant when he instead targeted the Dark Eldar skimmers with it their Jink saves protected them.

On turn two I got to unleash my gimmick on the Space Wolves. My Night Scythe delivered the first unit of Deathmarks, two more units Deep Struck, and I used a Veil Of Darkness to bring Zandrekh's unit of Warriors up and Obyron's Ghostwalk Mantle to deliver the Wraiths. The Dark Eldar had already opened up the Land Raider and I made quick work of the unit that had been within, but couldn't get past the 2+ save of his warlord. Having thrown all I could at him he was then able to retaliate, killing off Zandrekh's Warriors as the Nemessor himself was swallowed up by Jaws of the World Wolf.

Over the next few turns I traded blows with the Wolves, while the Dark Eldar and Tau fought it out on the other side of the board. The Dark Eldar Archon, Incubi and Grotesques hunted down the Tau Ethereal but were the Tau retaliated by gunning them down, the Archon's Shadow Field shorting out just before the Hammerhead turned its main gun on him to land the killing blow.

Going into turn four we were running short on time, so agreed we'd finish the game after that turn. Dark Eldar moved up a Raider full of Warriors to support the Ravager on the objective. None of us were in a great position to counter them, but I used my remaining Veil of Darkness to bring a squad of Warriors into Rapid Fire range, and Zandrekh who had now joined a squad of Deathmarks used his Ghostwalk Mantle to bring them into firing position. They fired everything they could and did enough casualties to force a Morale Check, but the Dark Eldar weren't for being chased off their prize. 

My last ditch effort was to assault with my two remaining Wraiths, making a Disordered Charge against the Raider and the Ravager. It would have required destroying both and making a good Consolidation roll to contest the objective, but instead they failed to take the last hull point off of the Ravager, and only took two of the Raider's three hull points leaving it intact.

Space Wolves made the next attempt, and managed to gun down the Raider but the wreckage now obscured most of the Dark Eldar Warriors on the objective and he was unable to kill enough with shooting to cause a morale check. He made a final effort to leap-frog onto the objective by charging one of my Deathmark squads in the hopes of consolidating up to the objective, but was unable to consolidate far enough.

Inspired by all our failures to reach the Dark Eldar in combat, combined with the fact it was unable to shoot this turn, the Riptide tried to string out its own assault onto the damaged Ravager, but was unable to reach it in time.

That left the Dark Eldar as the clear winners, with the objective, one Slay the Warlord, the Price of Failure for killing the Ethereal, First Blood, and the Vertigo bonus objective for holding the highest ground on the battlefield. 

I definitely expect we'll be playing more Carnage again, though since we ran into time constraints we've already discussed dropping the point values to 1250 or even 1000 each, instead of the 1500 we used this time. I've also got plans to do a separate article looking at the Necron teleportation gimmick I experimented with here, as it was a lot of fun to use and I expect I'll be giving it another chance.

Our Dark Eldar player has also posted up a battle report and photos for this, you can view that at http://www.thedarkcity.net/t8841-carnage-a-four-player-free-for-all#93981


Dark Eldar deployment

Tau deployment

Space Wolves deployment

Necrons deployment

Dark Eldar Ravager through the ruins

Space Wolf transports advancing

Dark Eldar skimmers

The Tau open fire on the Dark Eldar

Dark Eldar assault the Tau

Space Wolf squad on foot after the Land Raider is destroyed

Necrons teleport in amongst the Space Wolves

Deathmarks and a Cryptek make short work of the Space Wolves

Necron units in the Space Wolf corner

The Space Wolves seek vengeance

Zandrekh and his unit are wiped out

Space Wolves hunt down the Tau warlord

The Lone Wolf charges the Wraiths

No matter how many Space Wolves the Necrons kill there always seem to be more

The battle rages near the objective

Necrons teleport in to threaten the objective

Space Wolves also try their luck at forcing the Dark Eldar off of the objective